How to Paint a Checkerboard Pattern on a Concrete Floor
A checkerboard pattern is a timeless and classic flooring option for any space. It has been used for centuries to add a stylish design on a floor both inside and outside. Here I am going to go over the steps to create this patter on a concrete floor using paint. This is a budget friendly way to get the look you want without having to pay for expensive materials!
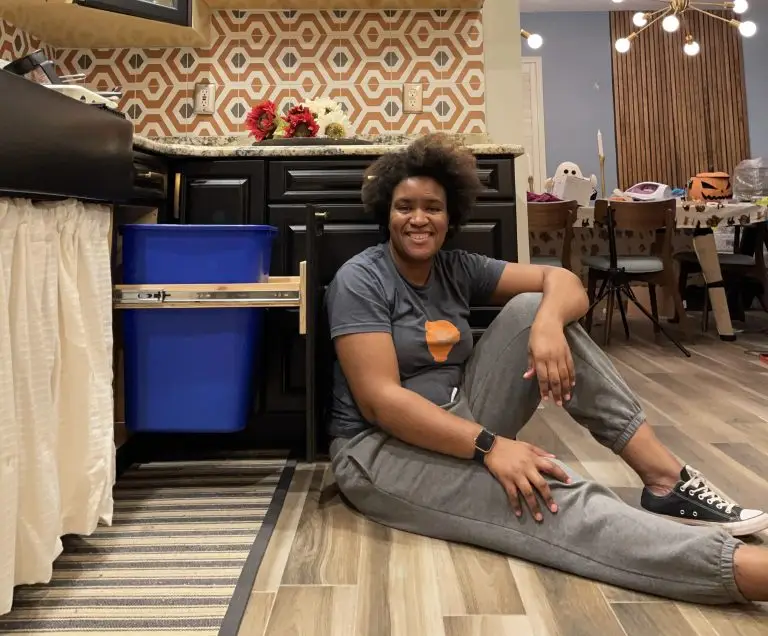
To do this project and make sure it lasts preparation is key. If you saw my first One room challenge blog post for the Patio project you’d know “prep, prep and more prep”. I cleaned and pressure washed every surface of the patio…and there is still more prep to do to get the floor ready! This is the recap for week 4 of the Onerous challenge form Spring 2024.

Step by step Painting a Checkerboard patter on a patio floor
1. Tools and Materials Needed to paint a concrete floor
Get the Materials on Amazon!
- Concrete floor paint (two contrasting colors)
- Concrete primer/sealer
- Measuring tape or laser level and chalk line
- Painter’s tape
- Paintbrushes and rollers,
- Drop cloths
- Level or straightedge
- Degreaser or concrete etch
- Protective gear (gloves, goggles, mask)
Get the Materials at Lowes!
Lowes Collection: Patio Floor Materials
2. Prep Prep and more prep
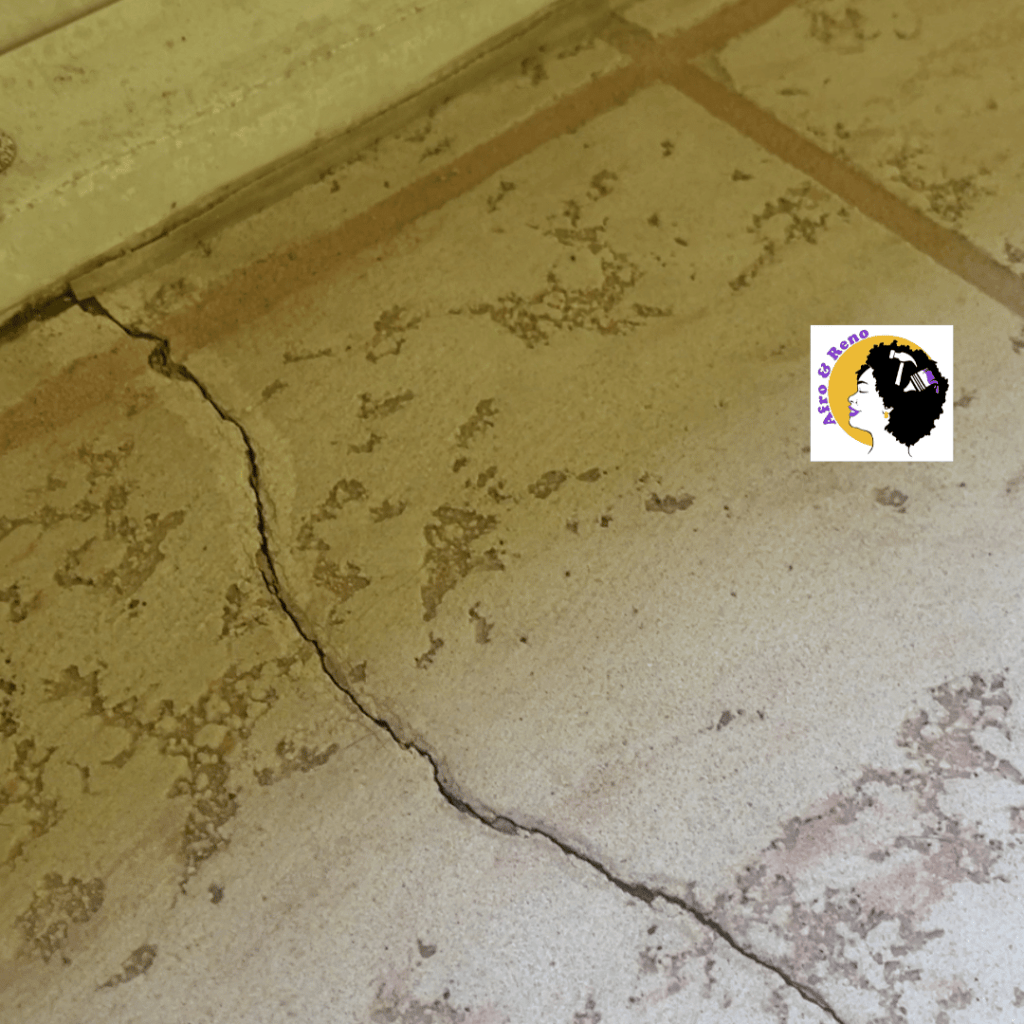
a. Cleaning and Repairing the Concrete
- Pressure wash the floors or
- Remove dirt, grease, and debris with a concrete cleaner. Make sure its is formulated for concrete floors.
- Fill in cracks and imperfections with concrete patch made for floors
- Allow everything to properly dry before going to the next steps.
- Etch the concrete floor to ensure adhesion and remove any previous coatings with a paint stripper

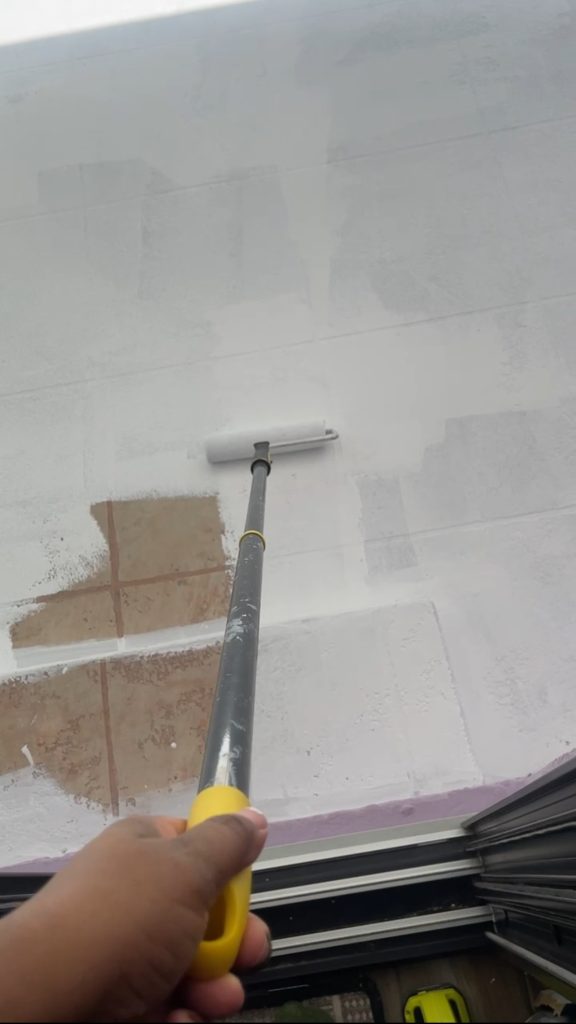
b. Prime the Surface
- Use a Concrete primer to ensure paint adhesion and durability. I used Stix primer
- Applying an even coat of primer and allowing it to fully dry
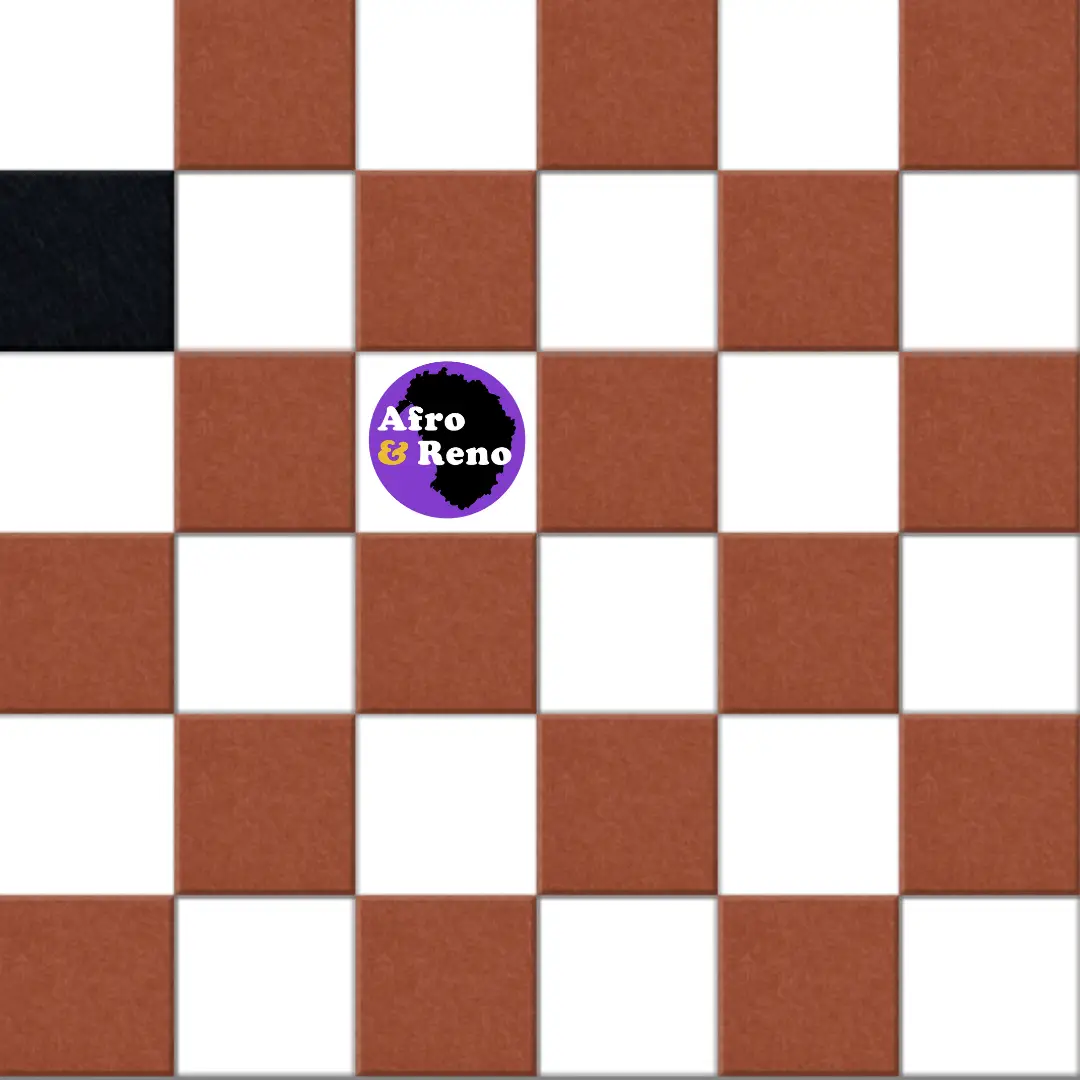
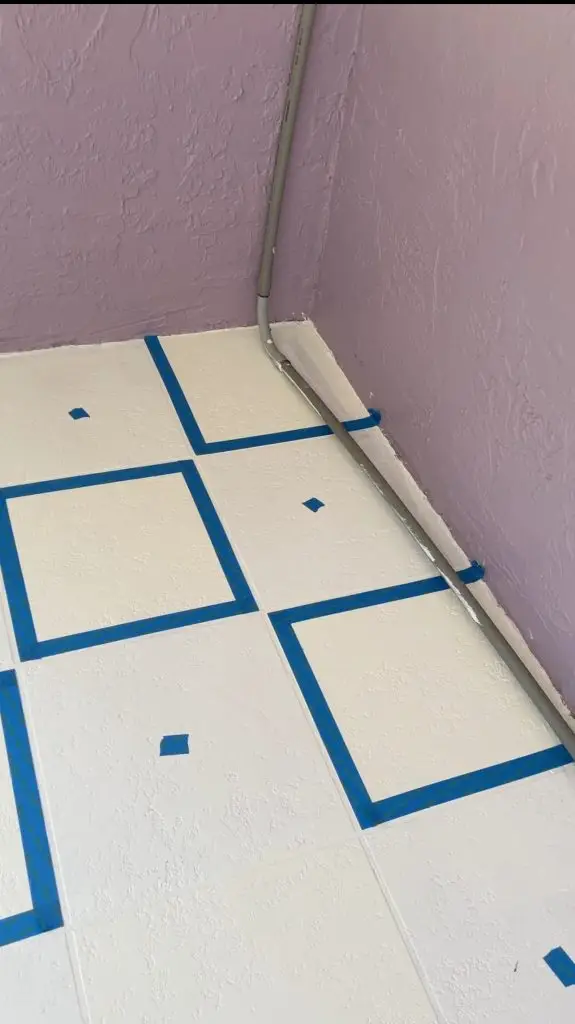
3. Planning your Checkerboard Layout
You can skip marking the pattern if you have stamped concrete like mine which is already has checkerboard squares
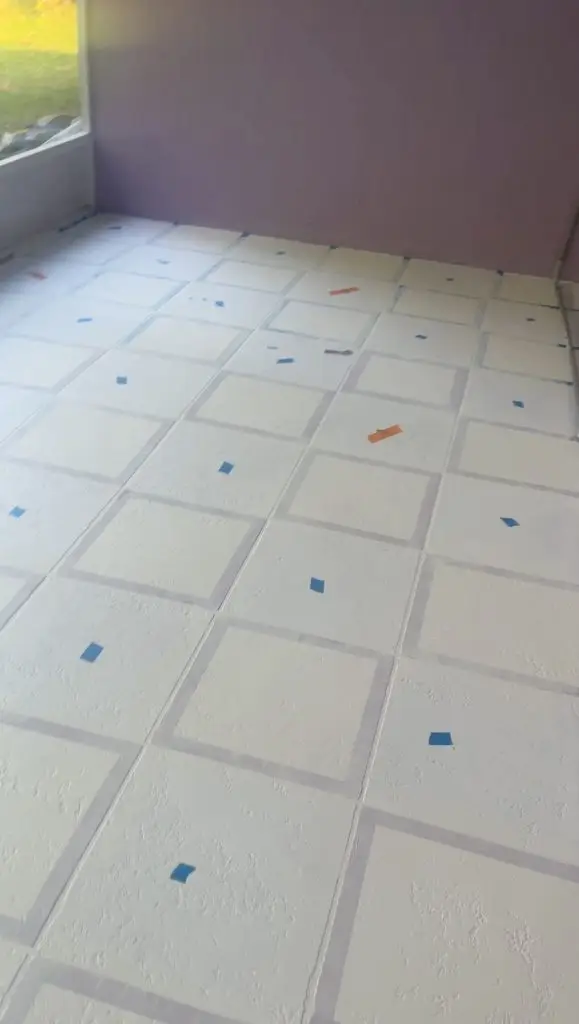
a. Measuring and Marking the Pattern
- Find the center of the floor for symmetrical design.
- Use a chalk line or pencil to mark a grid for squares.
- Double-checking measurements to ensure accuracy.
- Common orientation is a parallel pattern or a diamond pattern
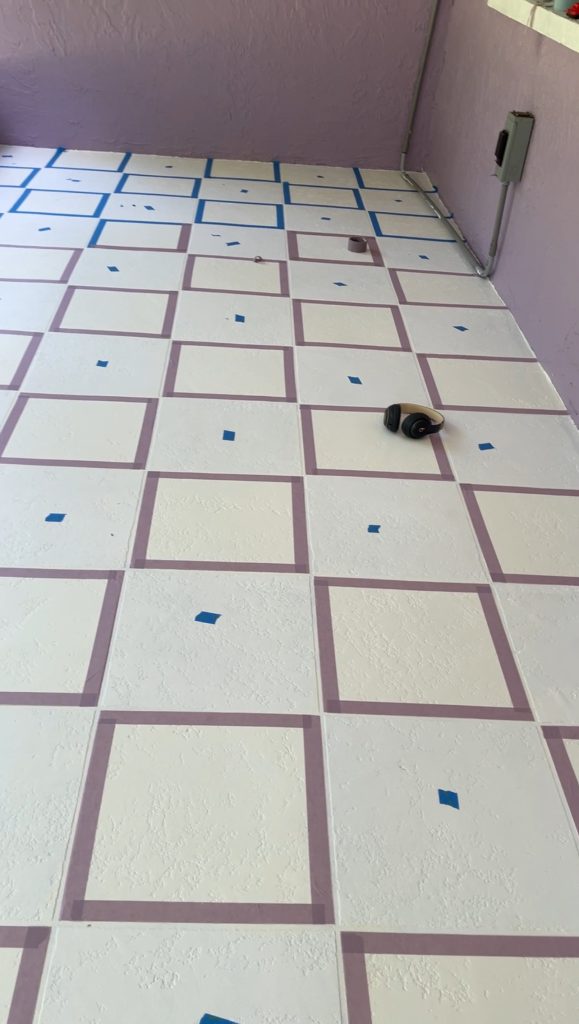
b. Tape Off the Squares
- Apply painter’s tape along all of your lines to create crisp edges.
- Ensure tape is firmly pressed to avoid paint bleed.
- Use caulk (do not use silicone!!) on the seams to seal your edges or roll another coat of primer on the tape to seal
4. The fun begins: Paint the Checkerboard Pattern
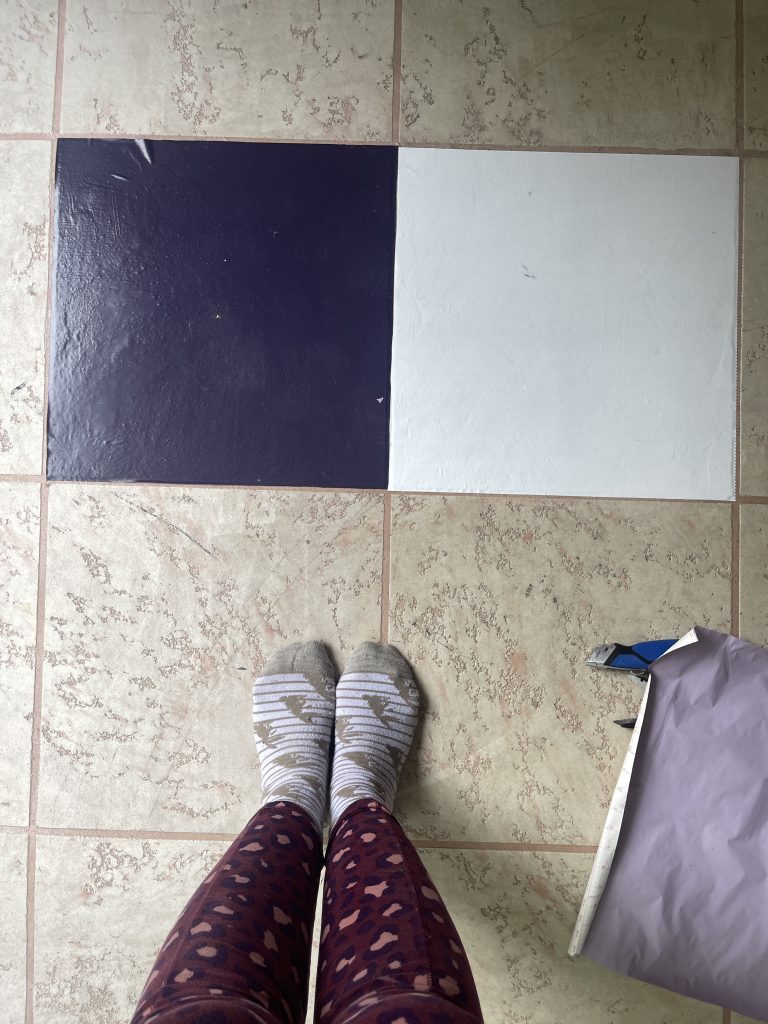
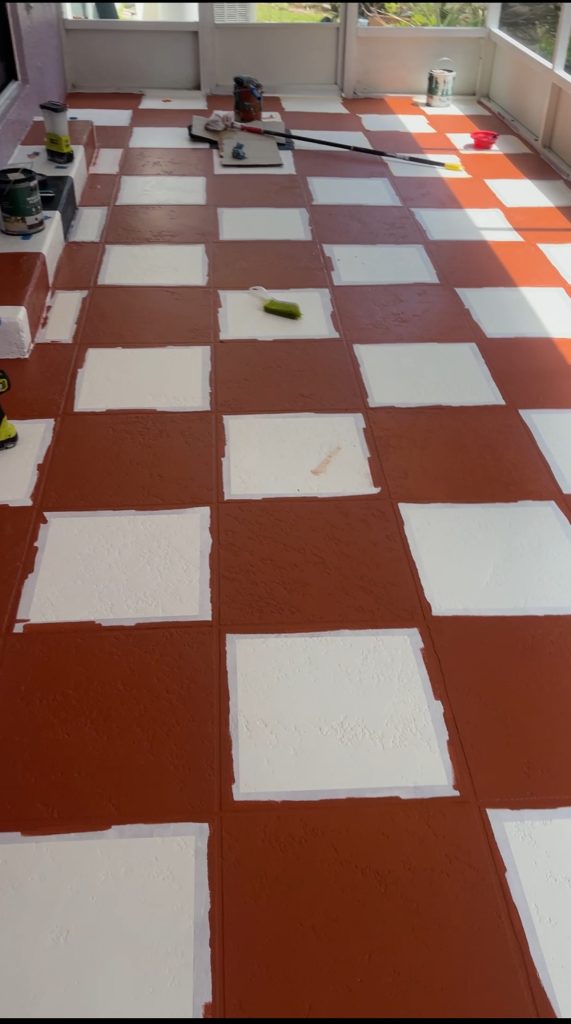
a. Apply the Base Color
- Paint the entire floor with the lighter of the two colors. This is the first mistake I made when painting my floor is I did each of the individual squares…It was a pain! learn from my mistake
- Allow enough drying time before proceeding to the next color. Follow the direction in your paint on dry times. If it says 4hrs between coats…wait 4hrs between coats!!!
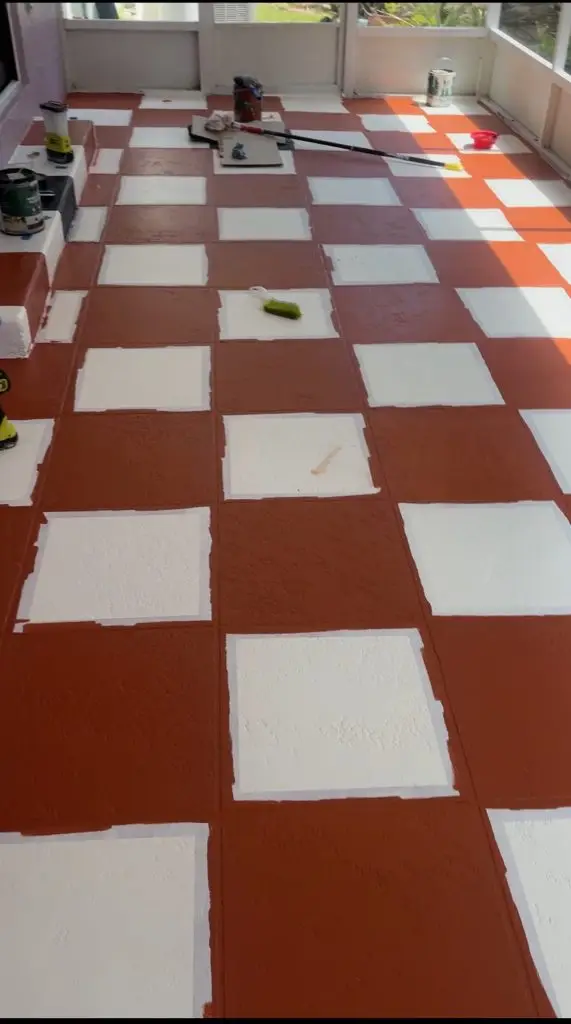
b. Paint the Alternate Squares
- Carefully applying the second color within the taped areas.
- Using a roller for larger areas and a brush for edges.
- Applying multiple coats if needed for full coverage.
5. Remove Tape and Touching Up (I’m so sorry)
- Peel off the tape carefully to avoid pulling paint. Ideally you do this while the paint is still wet cause it is easier to pull off, but you have to be very careful
- Touch up any imperfections with a small brush. I used a small artist brush to do touchups
- Allow enough drying time before completely using the space. Ideally 24hrs but if you can 48hrs is best. Follow the direction in your paint on dry times. If it says 24hrs before foot traffic…wait 24hrs!!!
6. Seal the Concrete Floor for Durability
- Choosing the right concrete sealer (glossy, matte, or satin) and decide whether it should have Anki skid properties. This means you won’t slip and fall if the floor gets wet. Definitely a must if near a pool or hot tub!
- Apply the protective topcoat to resist wear and stains. At least 2 coats to ensure full coverage
- Allow enough drying time before proceeding to the next color. Follow the direction in your paint on dry times. If it says 4hrs between coats…wait 4hrs between coats!!!
- Allow it to cure before heavy use or putting on furniture.
7. Tips for a Long-Lasting Finish: Maintain your floor for years to come
- Cleaning regularly with a mild cleaner to preserve the finish.
- Use furniture pads to prevent scratches or gouges in your floor.
- Periodically you may need to reseal the top coat to maintain durability.
Final Look: The reveal
 Checkerboard floor: Original idea
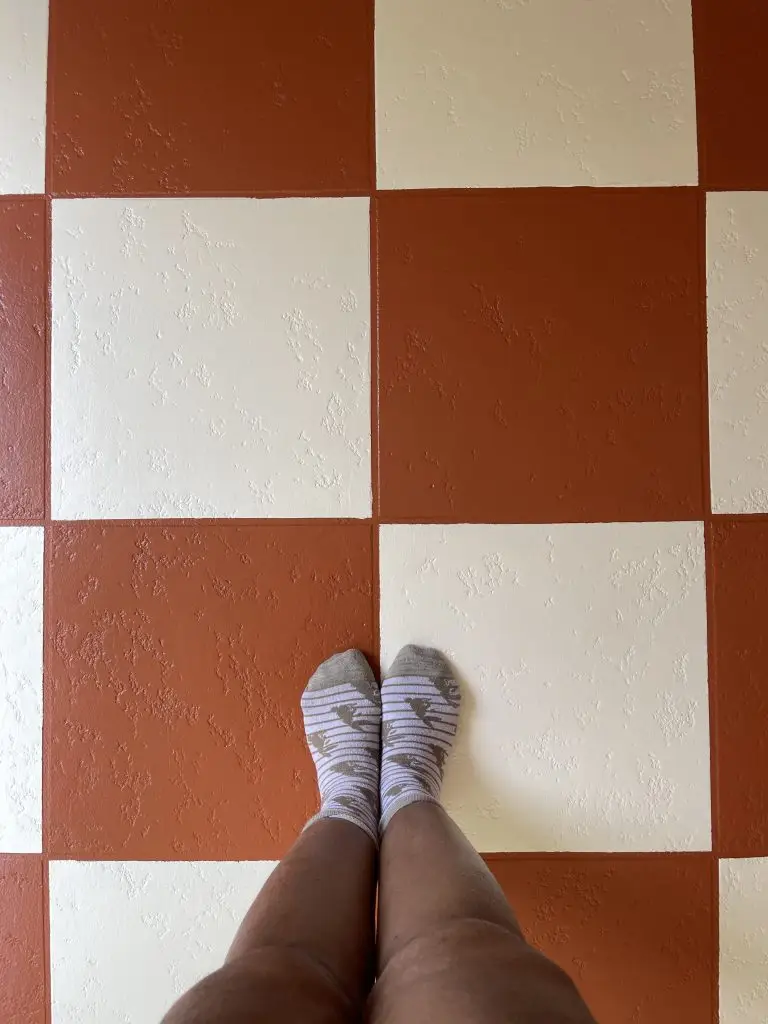 Checkerboard: Floor is complete closeup
Project Gallery


Concrete floor painting project Timeline
The timeline for painting a checkerboard pattern on a concrete floor depends on several factors, including drying times, the size of the area, and the complexity of the design. This project overall took me three weekends to do as I work full time. But this can be done much more quickly by someone with more time.
1. Prep prep prep (1–2 days)
- Cleaning and repairing cracks: 4–6 hours (plus drying time overnight if using a concrete patch).
- Priming the floor: 1–2 hours (drying time: 12–24 hours).
2. Marking and Taping (3–5 hours) (300 sqft took me 4hrs)
- Measuring, marking, and taping off the checkerboard pattern: 3–5 hours, depending on floor size and precision.
3. Painting (1–2 days)
- Applying base coat: 2–4 hours (drying time: 12–24 hours).
- Painting alternating squares: 2–4 hours (drying time: 12–24 hours between coats if needed).
- Touch-ups and second coat (if required): 2–4 hours (drying time: 12 hours).
4. Sealing (1 day)
- Applying sealer: 1–2 hours (drying time: 24 hours before light foot traffic, 72 hours for full curing).
Total Estimated Time:
4–7 days, accounting for drying times between each step.
Tips to Speed Up the Process:
- Use quick-dry primers and paints designed for concrete.
- Work in a well-ventilated area to accelerate drying.
- Plan for warm, dry weather to help the paint cure faster.
Spring ORC 2024 Patio Refresh Posts: Week 1 | Week 2 | Week 3 | Week 4 | Week 5 | Week 6 | Week 7 | Week 8: Reveal