How to use Wagner EZ Roller to Paint
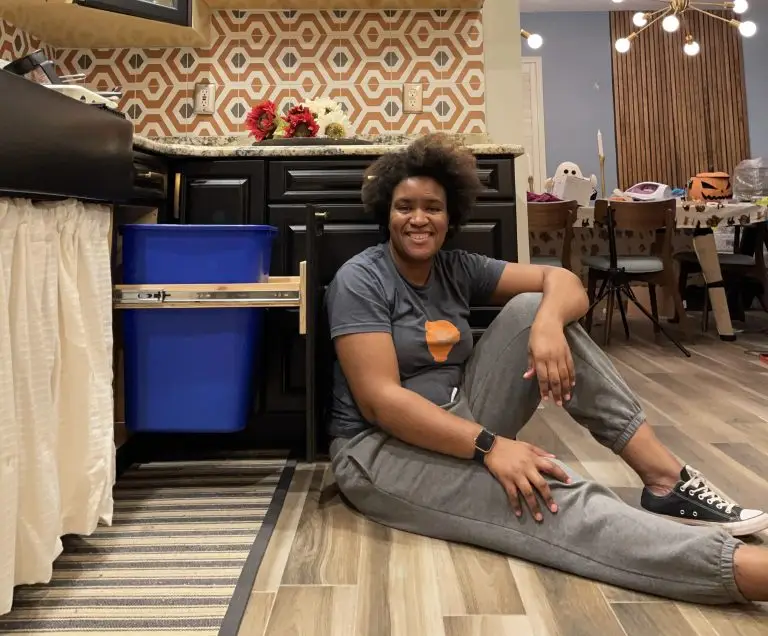
Frustrated by my paint sprayer I bought this roller. I did not want to paint the ceiling with a regular roller!
This week as part of the One Room Challenge Week 6, I painted my walls using the Wagner EZ Roller I got at Lowes as I walked through the paint aisle. If Lowes isn’t close by, you can also order it on Amazon and have it sent right to your door!
First of all, I used the Wagner EZ Roller to paint my ceiling in Week 3. It was still hard work but It made the process much easier! Now I’m off to do the walls, in a slightly different color. The best part is you don’t need a paint tray!! The roller holds the paint and helps you distribute it!

- Where to get the EZ Roller
- Amazon:
- Lowes:


How to set up the EZ roller
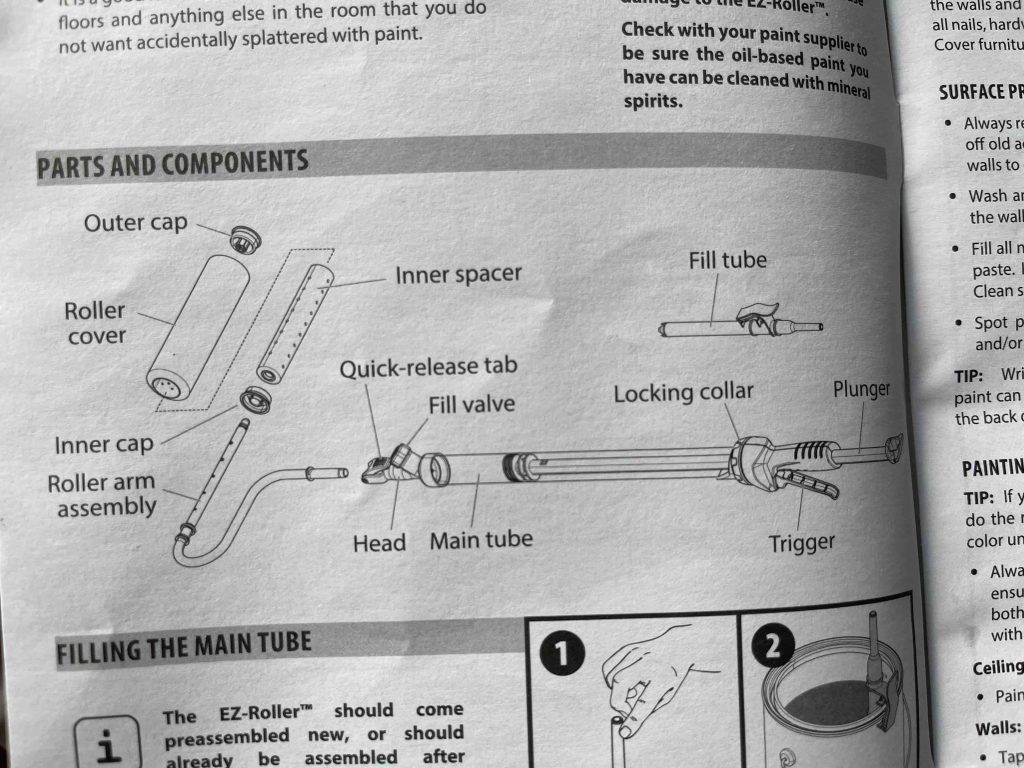
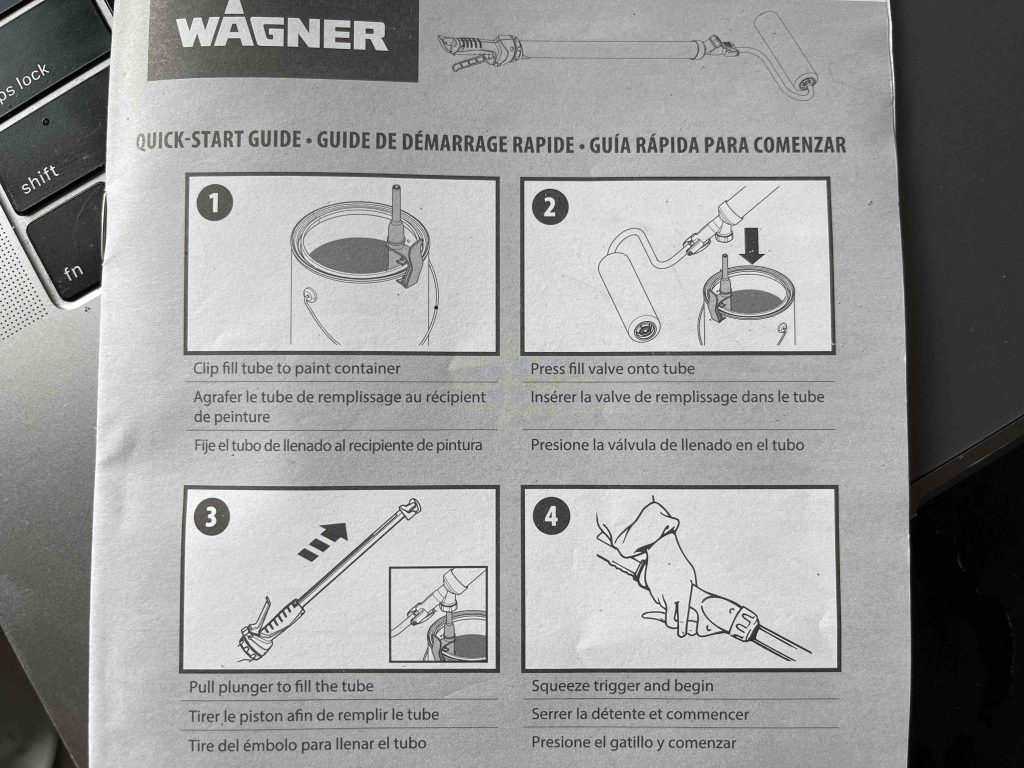
First, set up is super easy! You will connect the roller (#1) to the main tube (#3). Then you will put the fill tube (#2) in you paint can (after you stir your paint properly of course!). Next, stick the end of the paint base into your main tube (with reservoir)(#3) and pull on the plunger. Then, you will see the paint start to pull the paint into the main tube and fill the reservoir.
Therefore, to get the paint into the roller, disconnect from the fill tube (#2)(this step is really important!) then squeeze the trigger until you see paint in the roller. Moreover, this part can take a little bit before the roller has enough paint, especially with a new roller cover.

How To Use The Wagner EZ Roller
Nevertheless, use the EZ roller, you use it just like a regular roller, you roll it on your wall or ceiling, as you need more paint you squeeze the trigger to release more paint. You will notice that the plunger pushes on the paint in the main tube to get you more paint! However, I have noticed the longer you use it, the harder you sometimes have to push on the roller, but that could also be user error.
Consequently, as you run out of paint, instead of having to use a paint tray, you just fill up the reservoir with more paint! I refilled about 4 times to paint the walls, the process of painting with this roller is very easy, and I got those walls done in about 30mins!
How To Clean The EZ Roller
Uniquely to this roller, cleaning is a bit more involved. With regular rollers, I’ll be honest I’ve just been throwing away the roller cover and just cleaning the roller cage. When I first painted the ceiling, I did it over two nights and cleaned in between, it took forever to clean but I now know that its better to take all the pieces apart to clean the Wagner EZ Roller. Nevertheless, look at the image above to see all the parts or check out the manual here.
- First you’ll remove excess paint from the main tube, just stick in in the fill tube, instead of pulling the plunger, you push!
- Second you’ll clean your fill stick and main tube by attaching them, using a bucket of clean water pull clean water into your main tube, then push. Fo this several time to clean the tube and the fill stick.
- Third, disconnect the roller arm assembly from the quick release tab. Separate the roller cover from the roller arm assembly and the roller cap. NOTE: There will be paint here, lots of it! Take the roller cover out by pulling on the black piece (roller cap) at the end then using the metal piece (roller arm assembly) to push it out. There will be a foam piece (inner spacer) inside, keep it!
- Next, Clean the inner spacer, clean the inner and outer caps. To clean the roller arm assembly, reconnect it to the main tube, use a bucket to pull and push water out of the assembly. Make sure to remove fill tube.
- Despite the roller covers being washable, I like to throw away the roller cover but this can also be cleaned.
How to change the roller cover
If you have all the pieces separate from cleaning, this step is easy. Take out your new cover, put in the foam piece (inner spacer) , put in the the black inner and outer covers and the roller arm assembly back in.
What to do with excess paint!?
You over estimated and now you have too much paint in your Wagner EZ roller! Have no fear it’s actually really easy to get rid of excess paint! The same way you’ve been refilling your paint, is the way you get rid of extra paint! You stick it into the paint stick in your paint can, and instead of pulling you push the paint in the base back into the can! Easy Peasy!
My Review
- The Good:
- I like the ease of use of the roller.
- I like not having to use a paint tray
- Great for painting the ceiling!!
- Easy to set up
- Great for large surfaces with very few things in the way
- Good for textured walls or ceilings, but you may still need to touch up
- The Bad:
- Drips. I had drips everywhere the second time using it on the side of the roller, which I believe was because something wasn’t secure when I changed the roller cover.
- Cleaning takes work. You have to clean not only the roller cage, but the main tuber, the fill tube…all of it!
- The handle is bulky cause of the main tube.
Final ORC Project Thoughts
The end is near, we only have two more weeks left of the ORC. So whats left to do at this point? A lot, but not all of it can be done in time.
Lets start with what can be done:
- Wallpaper accent wall
- Finish adding door jamb to closet opening
- Finish adding door trim
- Sand and refinish thrifted dresser
- Build night stands
- Add shelves
- Put everything back in place!
What will not be done by week 8.
- Adding Closet door hardware (Need to re-order hardware, 4 week lead time)
- Send back old hardware
- Building closet doors (8 Panels!)
Latest On the Blog
-
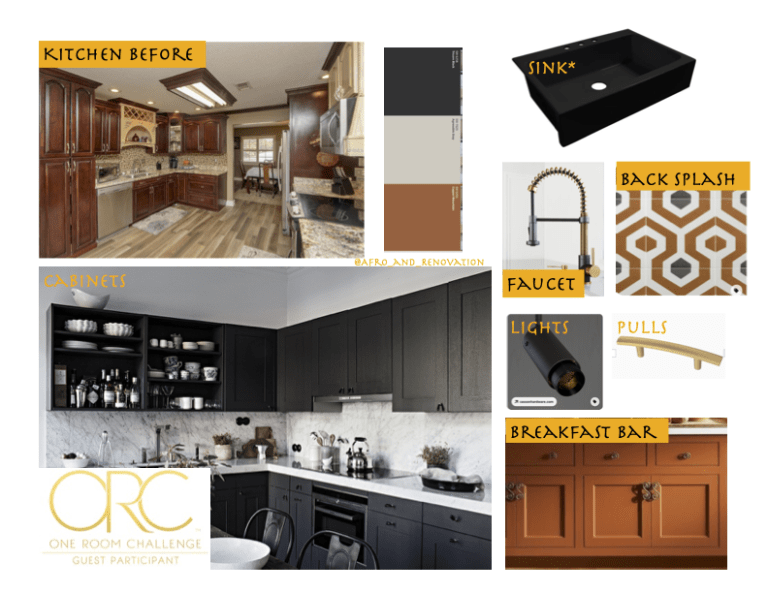
Kitchen Glow-Up for Every Budget: From Broke to Big money!
Are you a broke-y, balling on a budget or Big Money? Your Kitchen budget will help you decide where and when to tackle a Kitchen Renovation.
-
How to change you car cabin and engine air filter
In a Honda Fit, I’ll show you how to change your air filter and some tips I’ve learned along the way. It’s a good practice to check them at least once a year.
-
DIY · Garden · Tips and Tricks
Grow pineapple the easy way
The easiest way to grow pineapples is from a pineapple top. You know, the part you take off before cutting into the delicious fruit!


Oldies but goodies On the Blog
-
Boxes are for objects, not people
I am not a stereotype and I don’t fit into the boxes people think a Black woman fits in.
-
One Room Challenge (ORC): Fall edition
Customizing the kitchen one drawer and cabinet at a time as part of the ORC
It’s that time again for another One Room Challenge (ORC). I participated for the first time in the Spring starting phase one of the kitchen renovation. I will do a post later on this month how the spring challenge went. Hint: I finished it this week!
-
DIY | Home Improvement | Kitchen | ORC | Woodworking
Building a custom drawer: Recycling Bin
Customize your kitchen on a budget. This week we tackle building a custom drawer for a recycling bin. Works with a trashcan or easily modified for both!