One Room Challenge Week 8: Wait What!?
It’s reveal week for the One Room Challenge and I am way behind on blog posts
Today is the last day of the Better Homes and Gardens One Room Challenge! While I have been making progress in my kitchen, I have not been taking the time to put pen to paper and writing a blog post. After the extensive week 2 update with the instructions and a million images…I was all blogged out!
So what have I been up to? I am trying to get things off the counters as much as possible so that I can have a real prep space. What does my current work space look like? 👀🙉🙊🙈
The sink of course is great! It Holds so much! But the area on the left is my current coffee area/ dishwasher stuff. On the left it’s the clean dishes, appliances and miscellaneous items. I need my counter space! Therefore, my first solution is a coffee bar. If had been creating weekly blogs you would have seen my week 7 update where I painted everything…but since I’m going to get to that later 🤞🏾fingers crossed. I’ll show you the before and after of week 7 (maybe in the future this will be a link).
The Goal
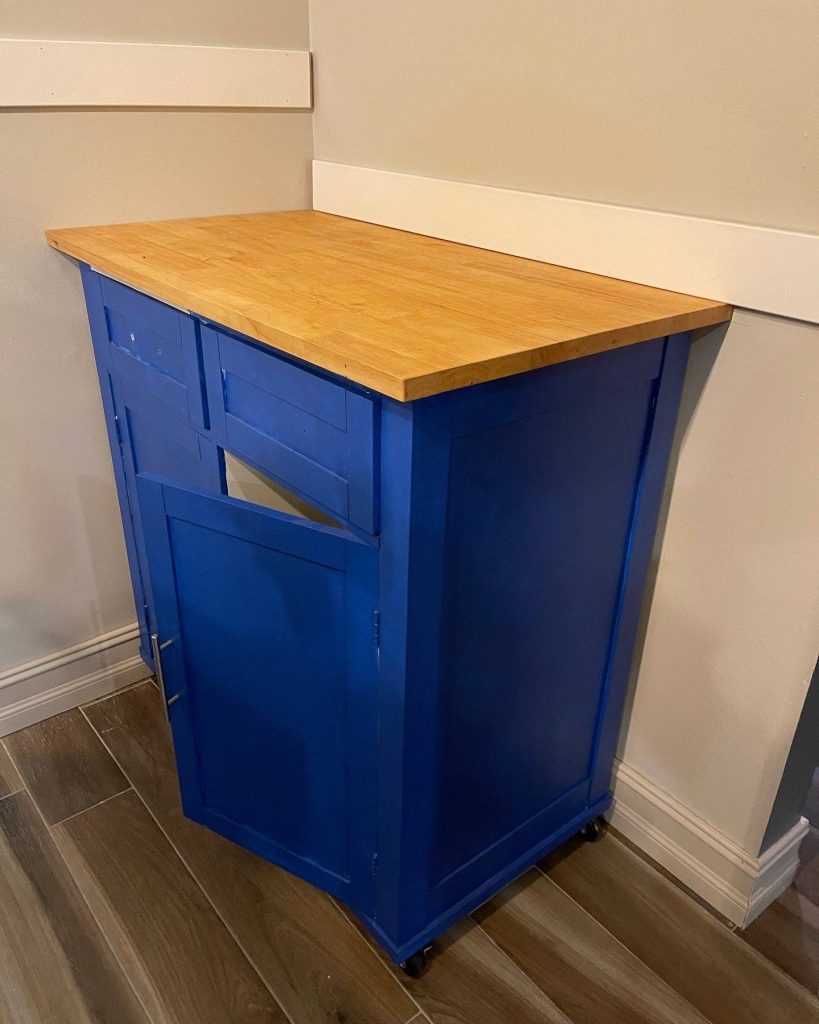

I got the cart on clearance at target about 5 years ago. In my old townhome I used it as an island. The original color was whites and I added a wax to seal the counter top. Fast forward to now. That wax SUCKS!!!! It made the counter top yellow, and it did not really help in sealing. Removing the wax topcoat was also the worst…took several sheets of sandpaper to come off. Priming it was essential because even the blue wasn’t sticking properly, this was before I knew that melamine finishes need a good sanding/primer. You live and you learn.
My plan for the coffee bar was super sophisticated and genius…
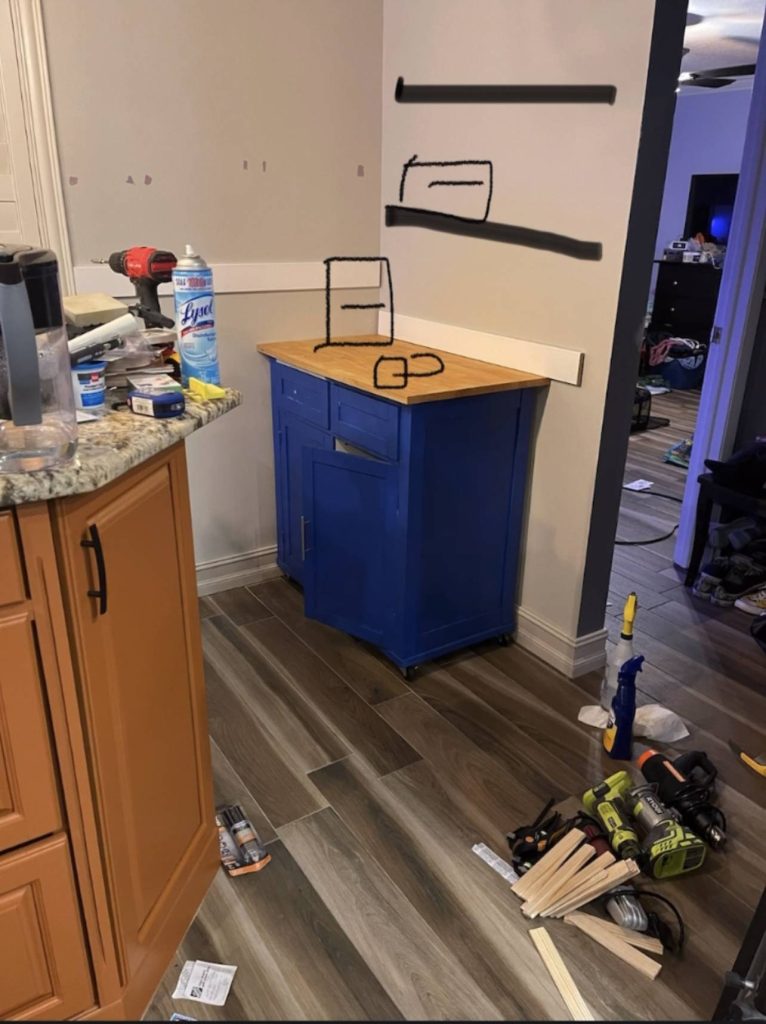
Coffee and Tea Bar: The Goal
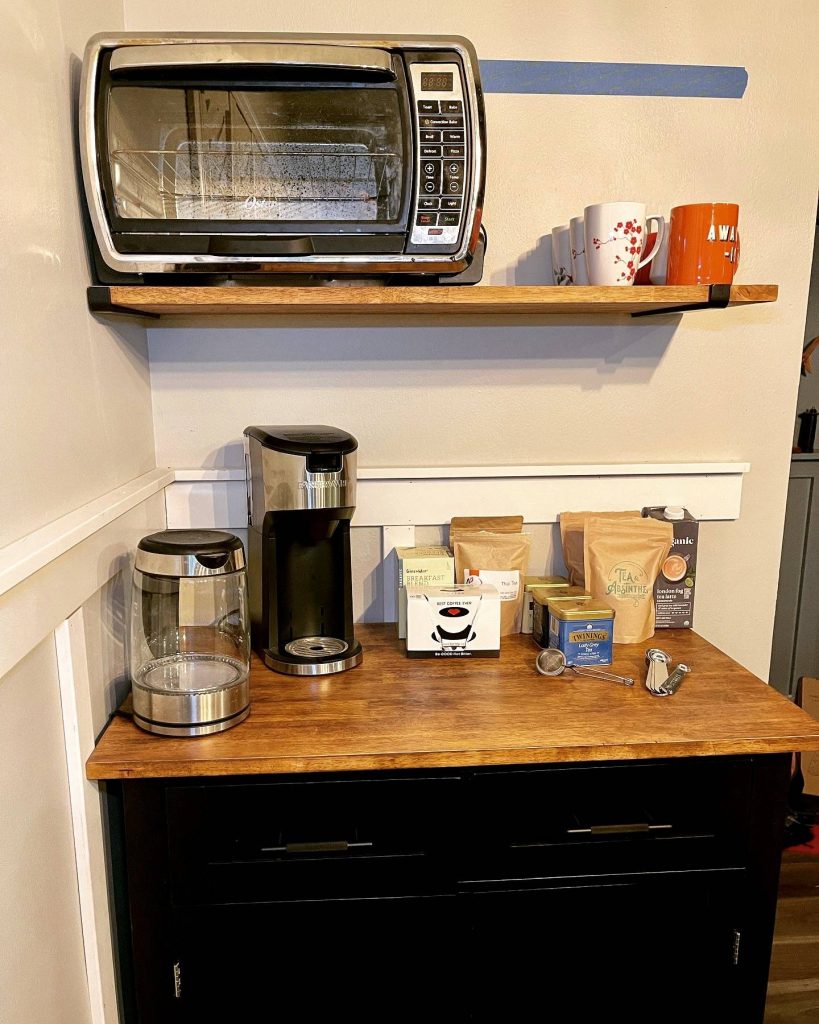
The goal is to add two shelves. One shelf will hold mugs and my toaster oven. The other will hold all the different coffee and teas I have.
Underneath the shelves will be the actual bar. The bar will hold my coffee make, a tea kettle and give me a bit of space to make my drinks.
There is plenty of storage underneath the bar so that will hold extra items out of the way. I sometimes buy multiples of coffee/ Tazo Chai mixes and other items.
I hope you like my fancy drawing.
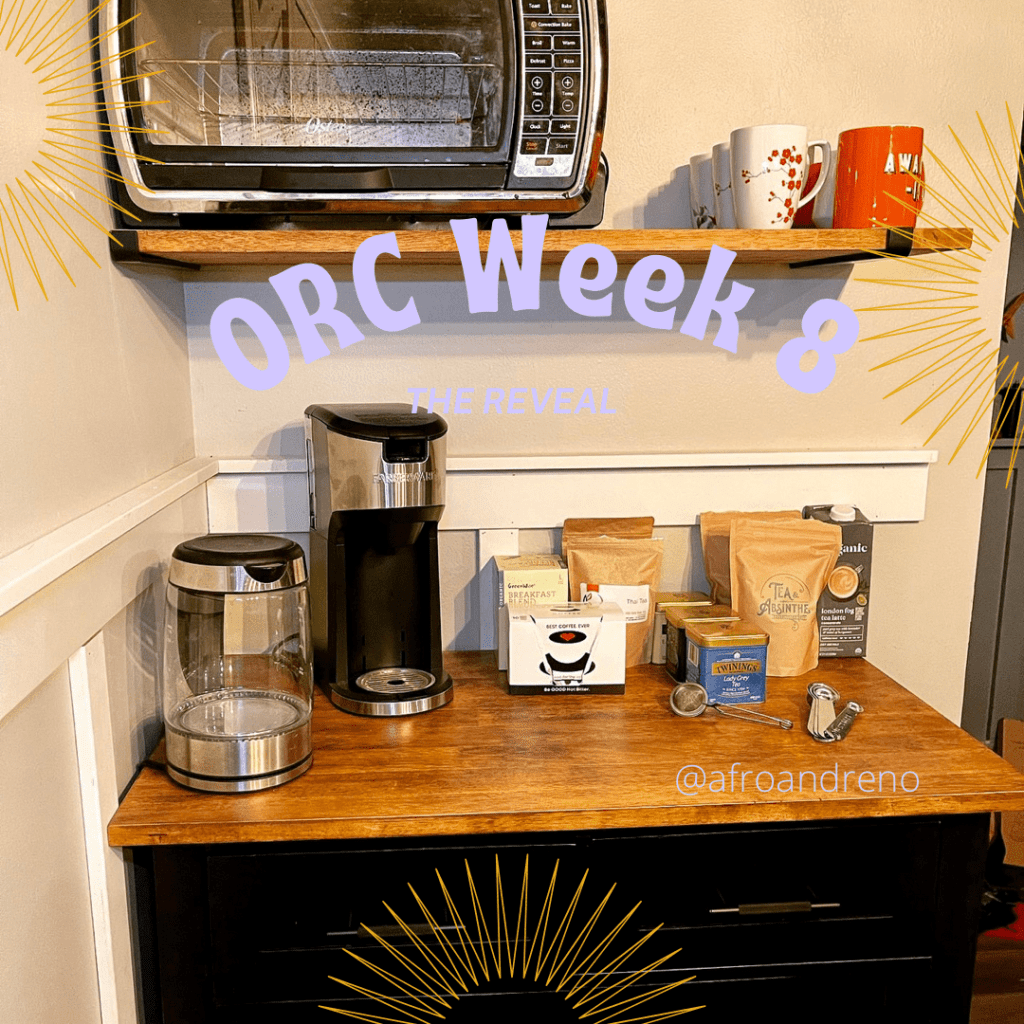
The Result
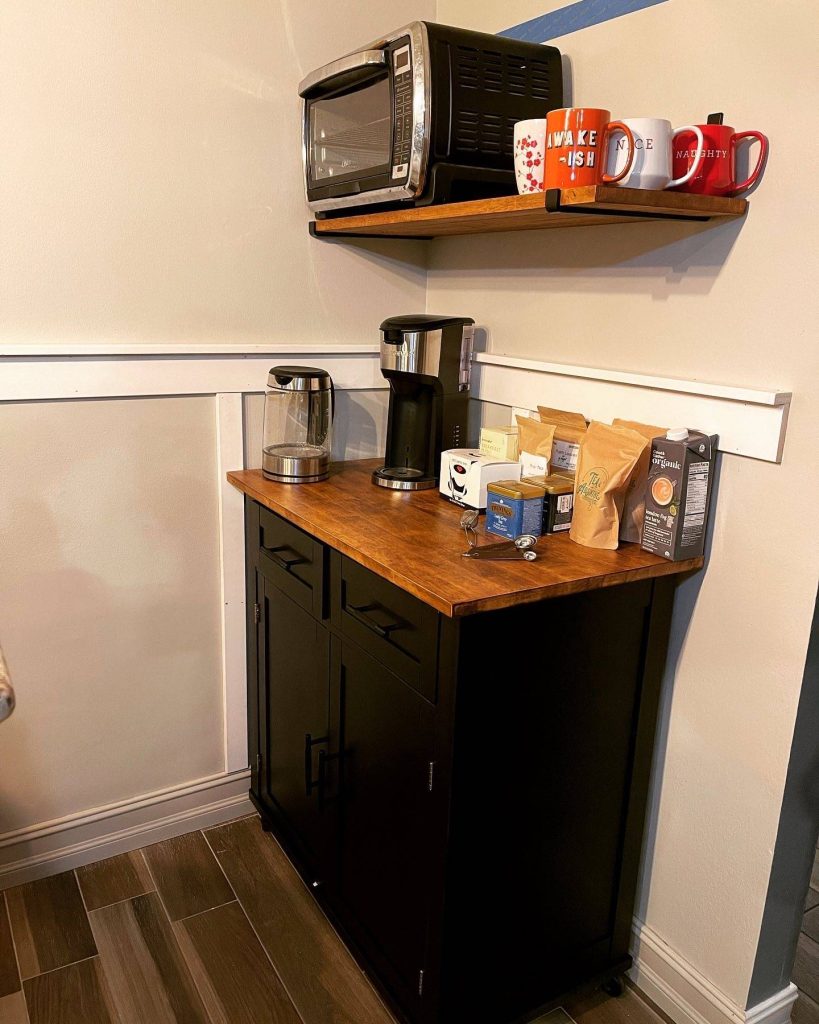
So what did I accomplish on the Coffee bar area! A lot! I finally finished the board and batten…It is not 100 percent finished but the structure is there. Look out for a week 9 update lol. I also added one shelf, with tape in the spot where the second will go. The shelf is the extension that used to be part of the cart. It folded down to be out of the way. Since it was no longer going to be used as an island, I removed it and it just so happened to be perfect for this shelf, no adjustment needed. It has been 2 years since I sold the townhouse, so its been a while!
If you’re wondering why I have the left J bracket all the way in the corner…well it’s where a stud is. If I want the toaster oven where it is…I trust the support at the stud than a drywall anchor. Aesthetically it’s weird so this may change in the future. The J brackets are from Cascade Iron co, they are made here in the Pacific Northwest by a family owned company. The brackets are nice and thick, and they have an even thicker option too! I got the 12in J brackets originally to go under the kitchen cabinets but be warned read the description and dimensions! The 12in brackets are 12 1/4 and will accommodate a full 12in shelf. I should have gotten the 11 1/4 brackets. They even have brass brackets too.
Whats Next?
You may also ask what is holding me up on the second shelf? One has to be built. I’m using some scrap wood from my office closet build back in January. Each of the 3 shelves produced one ~11 3/4in scrap piece from ripping 12in boards from plywood and one 12 1/4 piece because the Home Depot employee didn’t understand the assignment. I used my miter saw to cut down the 12 1/4 sheet into two pieces and glued them together. Last step is to be sanded down and stained.

The 95% club: What needs to be done to call this project complete?
- Sand and stain 2nd coffee nook shelf
- Install shelf brackets
- Caulk and paint Board and Batten
- Install DishDrawer panels
Stay tuned for more updates!
Kitchen projects


The all black look is so classic. Those drawer pulls are so cool! Also, I love the look of the butcher block. Your redeux looks great!
Thank you Felicia!!! I do love the back so much!