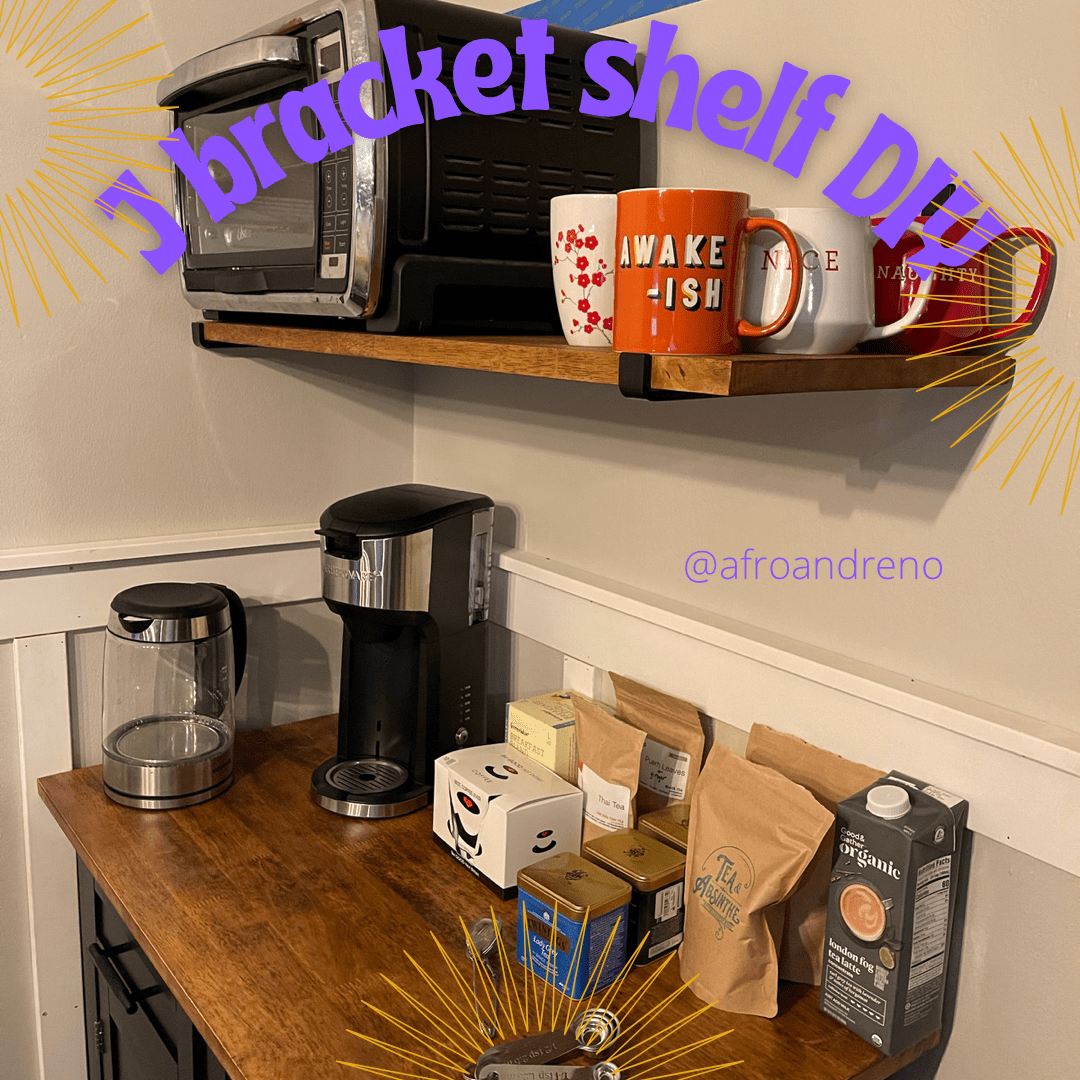
How To Add Shelves Using J Shelf Brackets
A simple shelf DIY using J shelf brackets and basic tools

When My friend Yami @thegroundedhome showed her kitchen I knew I wanted to have similar shelves! I did not want to have to figure out all the measurements to build full floating shelves and these seemed like a great solution. In my previous post I revealed the coffee nook but did not share how I put together this shelf!
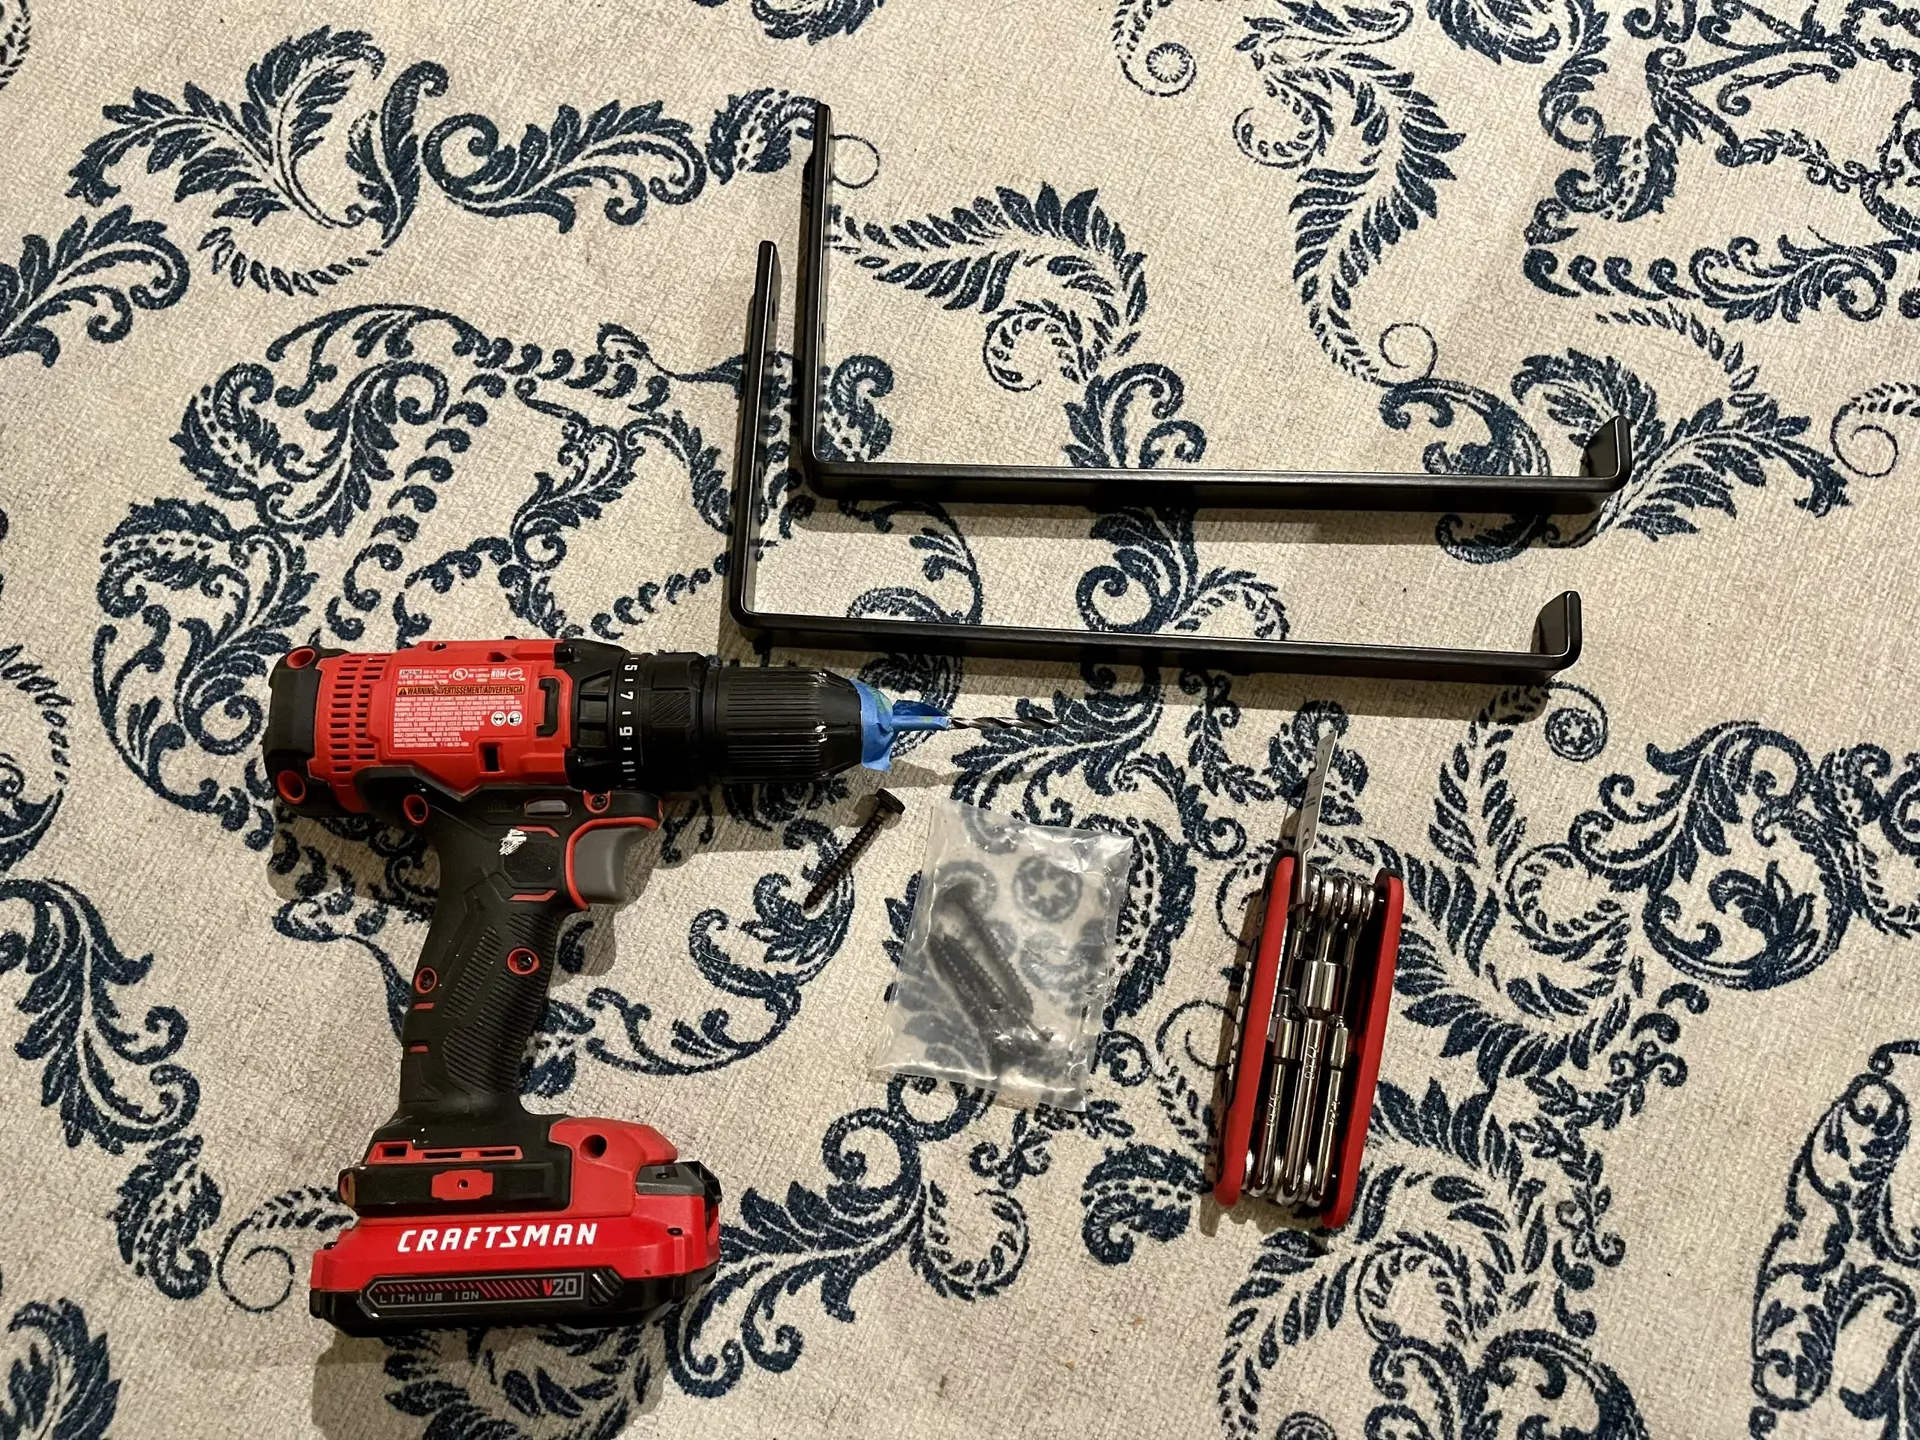
The key things you need are:
- J Brackets: I’m using the 12in Bracket from CascaseIronCo, make sure you double check your measurements!
- Drill
- 3/16 Drill Bit
- 7/16 socket or wrench for bolt (Amazon Affiliate Link)
With any DIY project it’s important that safety is first so make sure you are wearing protective eyewear and keep your bits away from the ends of the power tools. Also, a level comes in handy to make sure both brackets are level.
As I stated I bought the 12in brackets but it was for a different project, I did not end up using them because they were too big. Do not make the mistake I made and check the measurements on the website!!!! The 12in brackets are closer to 12 1/4in because they will fir a true 12in shelf. Most other companies sell 12in brackets that fit an 11 1/2in shelf. The brackets come with lag bolts when you order…these work well going into a stud, if you are not going into a stud you will need to order toggle bolts (drywall install), Masonry bolts follow their instructions for tile install.
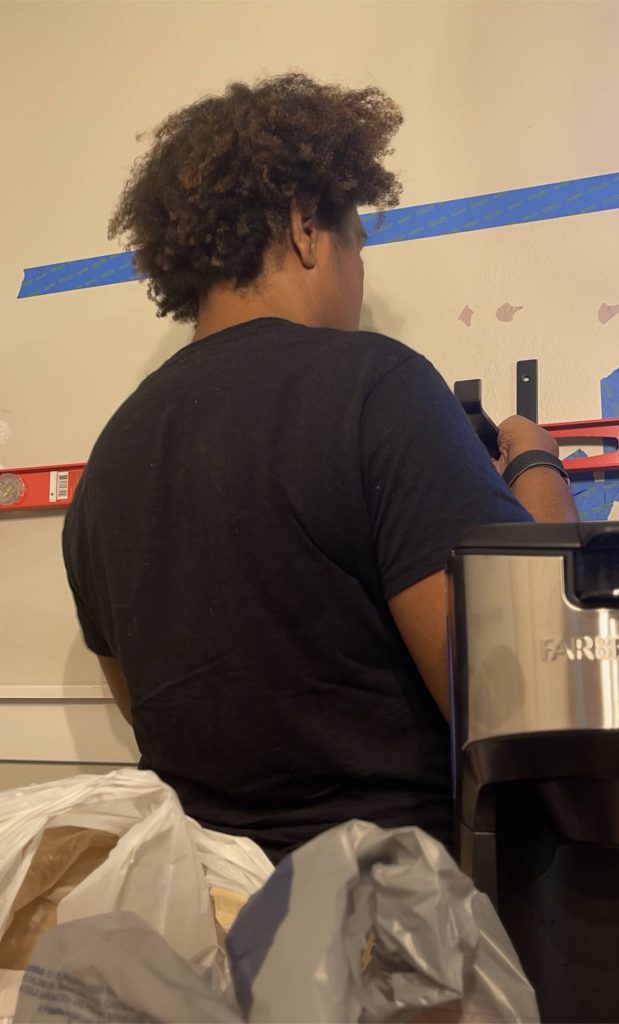
1) The first thing I did was use painters tape to mark out where I wanted the shelves
This makes it easy to visualize and adjust before making any holes. I already had painters tape on the wall showing me where my studs were.
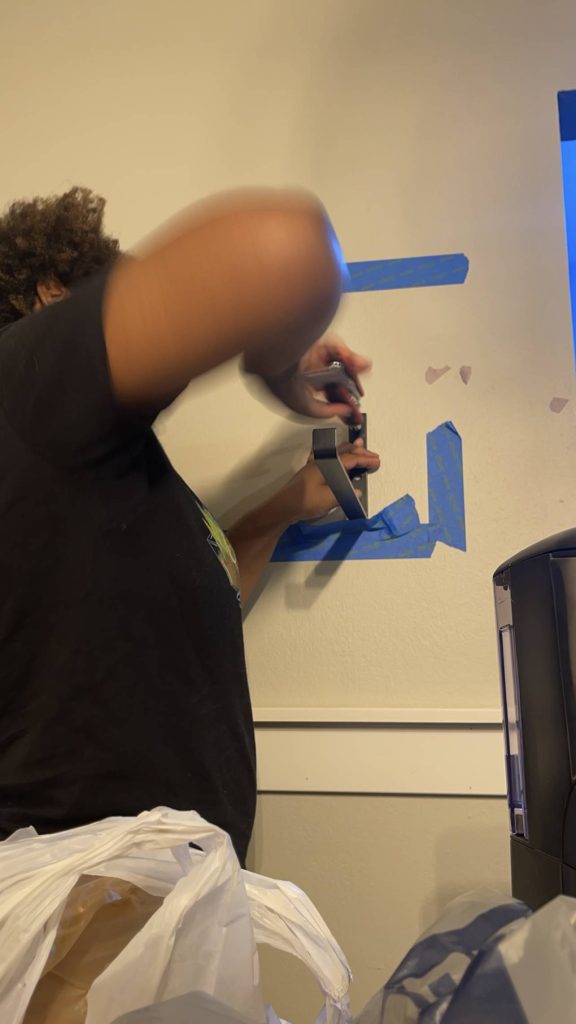
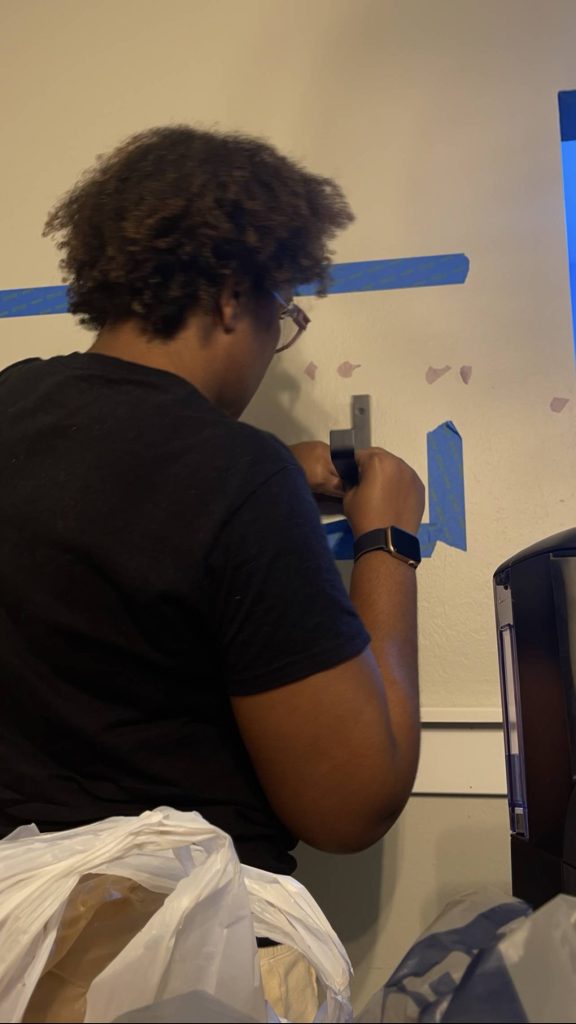
2) Knowing where the studs are I predrilled using the 3/16 drill bit
As you can see the stud in the corner was a bit hard for me to get. Once I had the holes for the first bracket I installed it
3) Using a Level and the 2nd bracket, mark where to drill for the second bracket
It’s helpful at this step to have a long level. Here I am using a 24″ craftsman’s level from Lowes.

You may have noticed I have a weird piece of tape under the bracket…its to catch all the drywall dust so it doesn’t get everywhere!!!

If you like a bulleted list of instructions…
- When ordering make sure you buy the correct size bracket for the shelf size you want. Make sure you know what kind of bolts you need for where you are putting your shelf. Comes with lag bots to go into stud, but may deed toggle bolts (drywall) or masonry bolts (for brick)
- Figure out shelf Placement. Use painters tape to make out where you want your shelves and length. This is a great way to visually see where the shelf will go and you can adjust as necessary before putting any holes in the wall
- Find the studs in the wall. A stud finders great in this step. You can use painters tape to mark the beginning and end of the stud
- Mark the holes and Pre-drill a 3/16″hole for your shelf bracket Pre-driling will help the bolt go in more easily
- Install the brackets using the bolts and a 7/16″ socket. This is a great time to make sure the brakets are level and plumb!
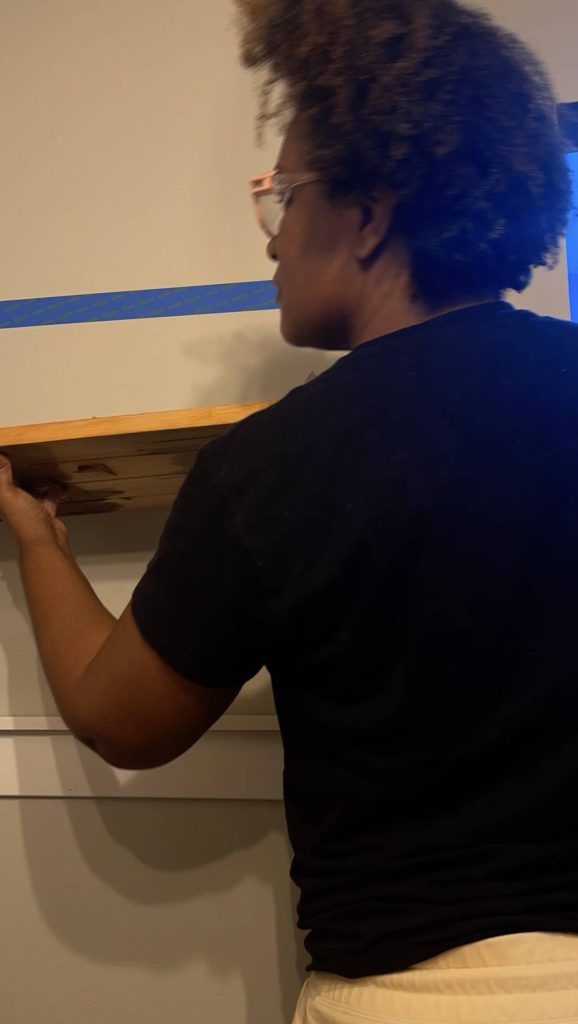
- Place your wood onto the brackets. All Done!
Next post will be about making your own shelf, measuring and cutting the wood, etc.